
Small chests, different airway, calm hands.
When your toddler turns blue during dinner, or your infant stops breathing in their crib, your brain will pull from whatever CPR knowledge you’ve stored. The problem? Most parents learn adult CPR techniques and assume they’ll work on children as well. They won’t, at least not safely. Pushing too hard on an infant’s chest can fracture ribs; tilting a baby’s head too far back can actually close the airway instead of opening it.
This guide walks you through the key differences between adult and pediatric CPR—enough to understand why specialized training matters, but not enough to replace hands-on instruction.
1. Assessment Changes Everything
Before you begin CPR, you need to know whether the child is truly unresponsive. With infants (under one year), tap the sole of the foot and call their name. For children (one to puberty), tap the shoulder and shout.
Pulse checks differ dramatically. On an infant, you feel for the brachial pulse on the inside of the upper arm. The carotid pulse, standard for adults, is nearly impossible to detect in a baby whose neck barely serves as a distinct landmark. You have only ten seconds to locate it.
One pediatric ER nurse emphasized checking for airway obstructions first: “Most pediatric arrests start because of some airway compromise, usually a lodged item like a small toy.” Look in the mouth before starting compressions.
2. Compression Technique: The Most Critical Difference
For infants, use two fingers placed just below the nipple line in the center of the chest. Compress about 1.5 inches deep, roughly one-third the depth of the chest. For children, use one or two hands, depending on size, compressing about 2 inches deep. The rate stays constant: 100 to 120 compressions per minute.
Compression depth is the most common error in pediatric CPR. Fear makes you tentative. But insufficient compressions won’t circulate blood to the brain. The chest should visibly compress—ribs may crack, and that’s an acceptable risk when the alternative is brain death.
3. Rescue Breaths Require Precision
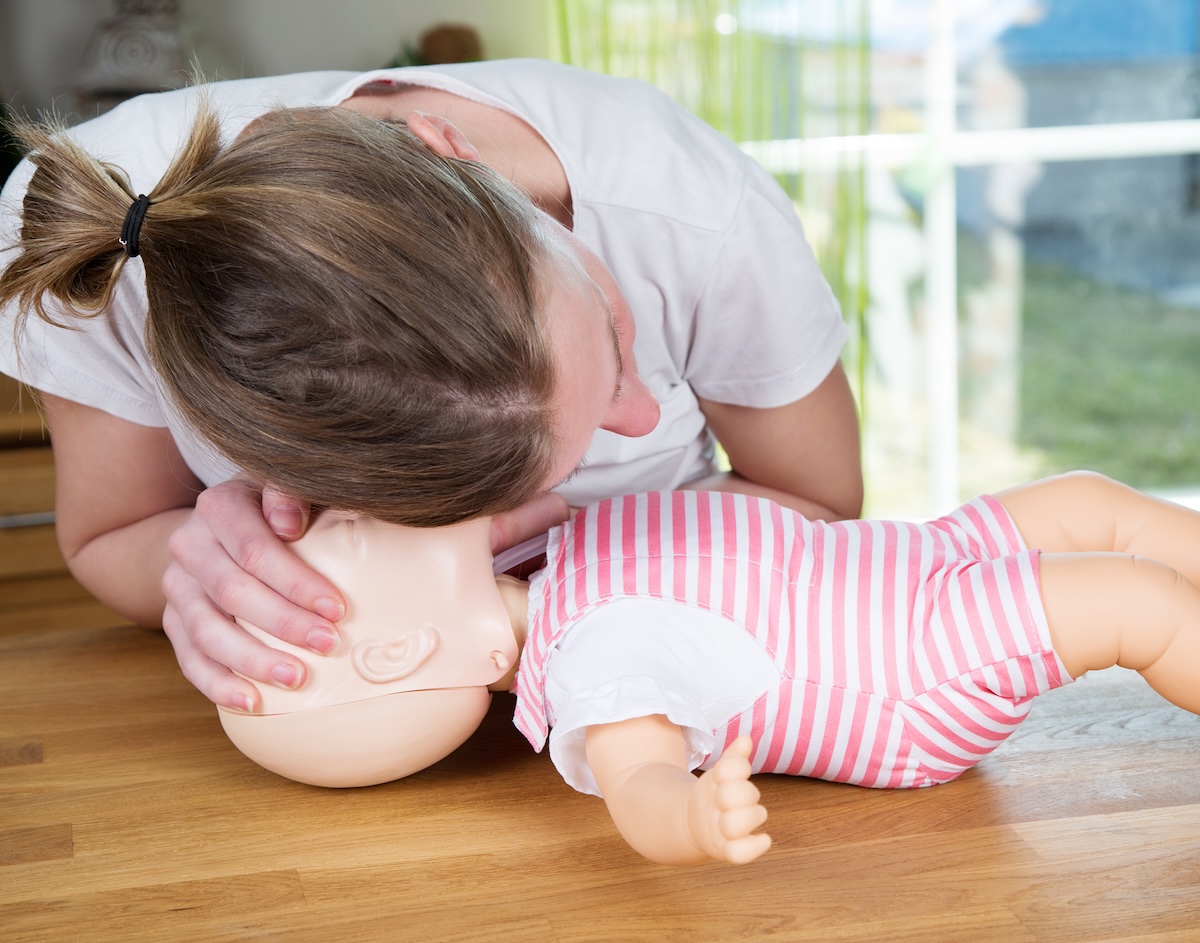
After thirty compressions, you give two rescue breaths. An infant’s airway is the diameter of a drinking straw. Tilting the head back too far kinks that straw shut. Instead, position the infant’s head in a neutral “sniffing” position. For children, a slight head tilt–chin lift works.
When delivering breaths, cover both the infant’s nose and mouth with your mouth. The nurse offers this coaching tool: “Showing parents what a chipmunk looks like and filling just that space in their cheeks with air.” That’s the volume you need—just enough to make the chest rise visibly.
Over-inflating pushes air into the stomach, causing vomiting and airway obstruction.
4. Choking Relief: Completely Different Protocols
If an infant is choking and cannot cry or cough, do not perform abdominal thrusts. Their internal organs sit too high, and you’ll cause liver or spleen damage.
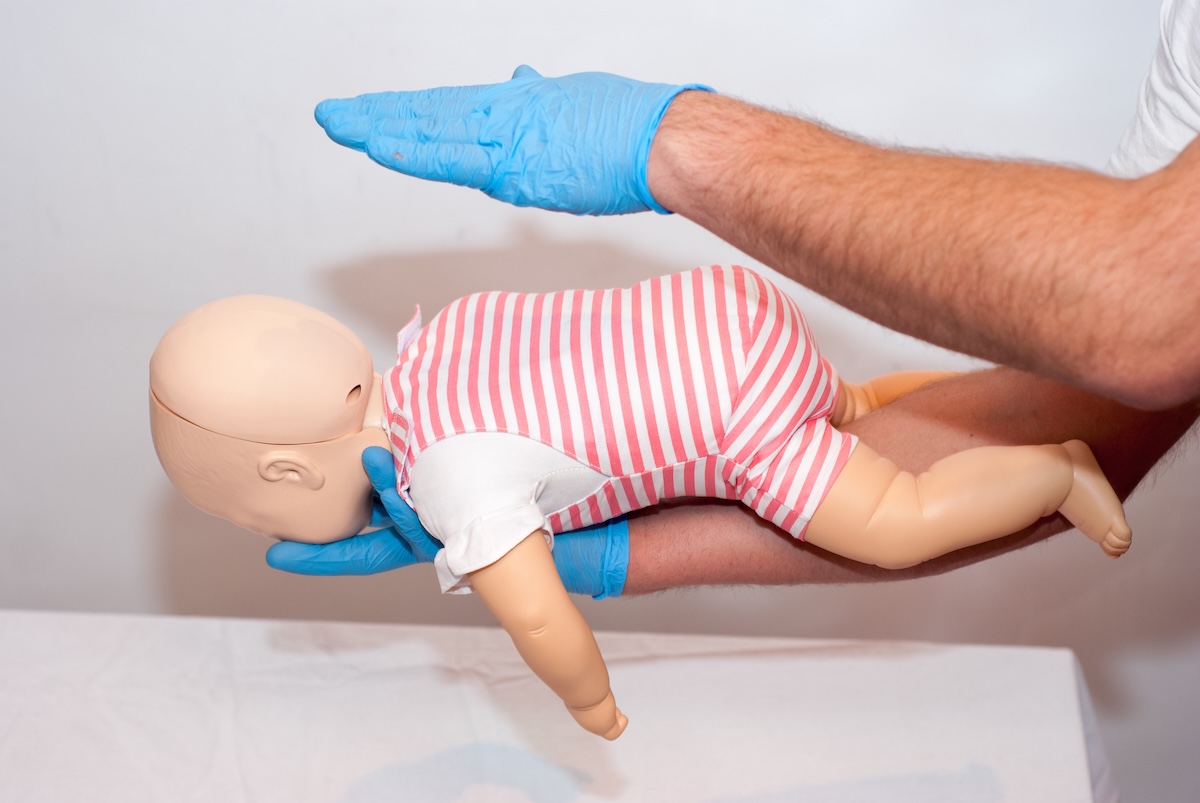
Instead, position the infant face down along your forearm, head lower than the body. Deliver five firm back slaps between the shoulder blades. Then turn the infant face-up and give five chest thrusts using two fingers. Alternate until the object dislodges or the infant becomes unresponsive.
5. Why Hands-On Training Matters
Reading about technique won’t prepare you for an emergency. Muscle memory will. Pediatric manikins have different resistance than adult models. They teach you what 1.5 inches of compression feels like versus 2 inches. You can’t learn this from a video or article.
The nurse sees the gap constantly: “When emotion takes over for a parent thinking about their own child while they’re practicing, the technique falls apart. You need an instructor who can talk you through the fear, correct your hand placement in real-time, and watch for depth errors you won’t catch yourself.”
When choosing pediatric CPR classes in Cary, make sure the course you choose has pediatric manikins for hands-on practice, and always look for instructors with pediatric emergency experience.
6. The Emotional Component
The parent who panics and gives breaths too forcefully or compresses too shallowly won’t realize the mistake without feedback. This is why pediatric CPR certification differs from online courses; you need someone watching, correcting, and coaching you through the fear.
7. Integration with Emergency Response
If you’re alone with an unresponsive infant or child, perform two minutes of CPR first (about five cycles), then call 911. If someone else is present, send them to call immediately while you begin CPR.
Your CPR buys time for professional intervention; it doesn’t replace it.
Your Next Step
The differences between adult and pediatric CPR aren’t minor variations; they’re fundamental protocols built around different anatomy. Join a pediatric CPR session in Cary where infant manikins are provided, instructors have emergency pediatric experience, and you’ll practice until your hands remember what your panicked brain might forget.


